This guest post is part of the Welcome Baby Tutorial Series!
Our first tutorial guest is Kim from My Go-Go Life. In all honesty, I'm less acquainted with Kim, even though I've been following her blog for a while. However, her blog is packed full of inspiration in all shapes {and quilty} sizes. Today she's offered to share a great pattern for Boutique Baby Bibs, perfect for a baby shower or your own little one. Enjoy!
Hi, I am Kim from My Go-Go Life. Thank you Jennie and CONGRATULATIONS!!!! I am so happy to be invited to guest post on something I really love to do, make baby items. I have always enjoyed making and giving bibs. Boutique style bibs are so very useful and can be made easily and less expensively than purchasing them.
You can start with either a bib you already have and love by tracing it (adding in a seam allowance) to provide a pattern or you can use the pattern I have been using for years. There are two sized patterns I have. One for smaller babies and one for bigger babies into toddler years. For this tutorial I will be using the pattern I have here.
For the smaller bib when printing select scale to fit, for the larger bib select no borders.
After you have your pattern printed , line it up and tape it together
If you are tracing your own, feel free to skip ahead :o)
Cut it out
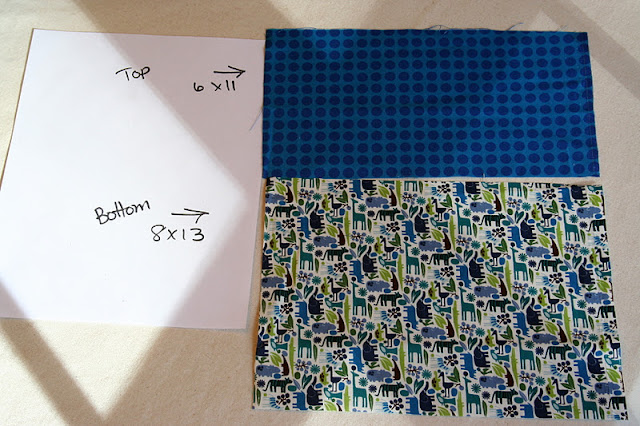
I am making the smaller bib, and I will be making it with two super cute fabrics
Right sides facing sew the two pieces together
Flip the pieces over and topstitch
Place the sewn piece on top of your backing right sides facing. You can use chenille, minky or fleece. If you are making a reversible bib you can add a layer of flannel in the middle for absorbency.
Pin the pattern down
Cut out the bib
At the top of the bib leave an opening to be able to turn the bib right side out
Sew around the bib using a 1/4 inch seam, starting and stopping at the top of the bib
Pin the top opening together
With a coordinating thread topstitch around the entire bib
The closure is up to you. You can use velcro or snaps. I have a standard size snap press but I was at my local fabric store and saw their new baby section and bought this hand held snap press. They even have poly resin snaps in different colors. Pretty cool!
You will need two backs and one male and one female piece
Push the back into the end
this is how it will look on the opposite side
Place the male piece on top
and let the snap pliers to do the work!
Repeat the process fro the female side and you are DONE!!!!
You can make these bibs as simple or a fancy as you like.
Happy bib making!!!!!!!
Kim :o)


They're adorable! Thank you for a lovely tutorial.
ReplyDeleteAnything happening yet??!?!?! =)
I will have to make some for my little one before she gets here. Love the tutorial, they look adorable. Thanks for sharing.
ReplyDeleteLove them! I have a great grandbaby (girl- Juliet Anastasia) due in March, sew I will get busy. Is there any place I can download the pattern?
ReplyDeleteThanks for the tutorial! i am SO going to make some of these!
ReplyDeleteGreat tutorial Kim! I would like to try out some laminates with this.
ReplyDeleteVery cute!! Thanks for the tutorial.
ReplyDeleteGreat tutorial and your bibs are so pretty :)
ReplyDeleteTHIS is a great tutorial! I love it! The bibs are adorable and this has inspired me to make some bibs for a girlfriend of mine who is expecting, along with a pastel rainbow quilt I have been thinking about for her. I need to get to work! This tutorial is fantastic!!
ReplyDeleteYay for the bib tutorial! It has been a long time coming!! ;-)
ReplyDeleteOh I'm going to put my name down for this!
ReplyDeleteThese are awesome! Thank you for this tutorial! Gotta get started making some! :)
ReplyDelete