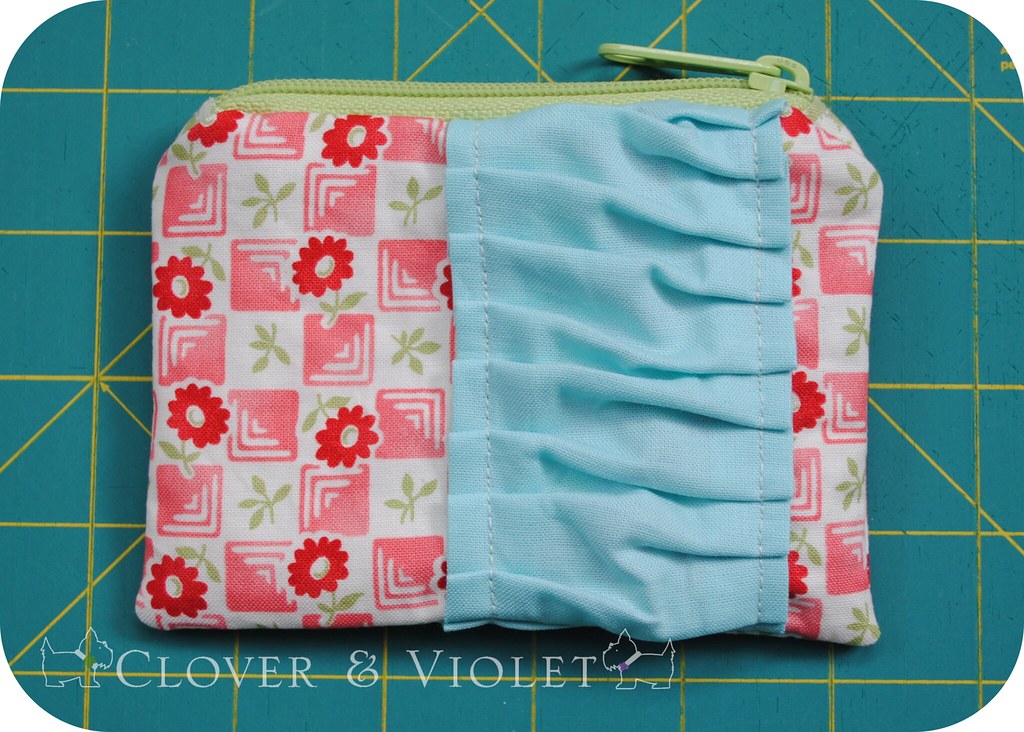
I've been wanting a little coin purse to match my bag, and have seen the cute ruffle ones floating around the internet, so I decided to try my own out of some Bliss, Kona Aqua, and Moda Bella Snow. It turned out so cute and easy, I thought I'd share. You could easily make it from scraps, I did.

From your fabrics cut:
- 2 -5 1/2" x 4 1/4" rectangles print for the body
- 2 -5 1/2" x 4 1/4" rectangles interfacing (not pictured)
- 2 -5 1/2" x 4 1/4" rectangles solid for the lining
- 2 - 3" x 1 1/2" rectangles for zipper ends
- 1 - 3 1/2" x 9" rectangle for ruffle

When it is stitched you will have a nice, even ruffle on one side of the fabric. Carefully adjust the fabric and pin from the other side before you begin the second side of stitching.

Pin the ruffle edge to the top of the purse for an even start. To stitch the other side, first, push the ruffler teeth {the ones that gather the fabric as you stitch} all the way forward, then carefully slip the fabric into the ruffler.

When you lower your needle the ruffler teeth should move back out to gather a ruffle, the image above should help demonstrate.

Then, carefully continue to ruffle about 1/4" from the edge while stitching the ruffle to the purse front.

The finished ruffle should be a little longer than the front of the purse and both edges should be stitched down.
Trim the ruffle to the size of the purse.

Then construct the zipper coin purse using the ruffled piece for one of the outside pieces. First prepare the zipper tabs. Fold the tabs in half and then fold the raw edges in toward the fold.

Trim your zipper to 5 1/2" and place the zipper ends on the raw edges. Carefully {note: I have been known break a needle by sewing too fast!} double stitch the tabs 1/8" from the edges to finish.

Place the sipper right sides together with the front of the purse.

Place the lining on top of the sipper and stitch with the zipper foot along the top edge. Fold right sides out.

Again, place the zipper right sides together with the purse back.

Repeat with the other lining piece also, and stitch with the zipper foot.

Then open the purse and unzip the zipper a portion of the way, this will make turning easier.

This is what the white lining portion should look like.

Then match the purse outside rights sides together and the lining together, then stitch around the edges leaving a 2" opening.

Clip the corners being careful not to clip the stitches.

Turn right sides out and stitch the opening closed. Then just tuck the lining inside and it's all set.
I've found this little purse is just the right size, and was quick and easy to make! If you make one, feel free to add it to our Flickr group. Enjoy!


Jennie,
ReplyDeleteThat is a great tutorial, I think I need to make one for myself! Love you!!
What a great tutorial!!
ReplyDeleteThank you for sharing it with us.
Sincerely, Trish
Thank you for sharing, i am more than a little intimidated by my ruffler foot still, but after seeing this tut, i will try it once more, this looks so slick and nice!
ReplyDeleteCute! Thanks for the tute, pinning!
ReplyDeletethanks for the wonderful cute tute! That's a great way to insert a zipper into a small purse - the results are super!
ReplyDeleteCute - thanks for the tute!
ReplyDelete