Do you have a custom URL for your blog? When I set up our blog, it seemed to me that the best way to go was to purchase a domain name before the blogging got underway. While this takes away the
free nature of most blogging platforms, I think it's a really good idea to invest in a custom domain if you plan to take blogging seriously. I've seen several of my favorite bloggers switch from a
.blogspot.com or
.typepad.com address to their own domain lately, so I was thinking I'd share my reasons for starting out at a
.com.
It is a tiny investment, about $10 a year {honestly, I have been known to spend more than that on
one trip to Starbucks!}, and if your blog isn't where you want it in one year, you can let it expire and just move your followers back to your free blog.
If you start with a custom domain and then decide later to move your blog to a different platform, you can make the switch without losing anyone because you'll be doing the switching, your blog address won't. If your blog is new, it will be much easier to move fewer followers now than hundreds later.
Also, a simple
.com domain will be more memorable than
.blogspot.com, etc. and will also be easier to search.
To help you choose your website address, using several different search engines, search your potential website to see what is already out there of the same/similar names. If you want people to find you, you need to appear at the top of the search list.
There are lots of places on the web to purchase a domain, but, since I'm using blogger for this blog currently, I purchased mine from Google through my blog dashboard {I'm not advertising for Google, I just found it easiest to have all my blog info consolidated!}. Just click "Settings" and then the "Publishing" tab and Google will take you through the process:
Once your domain is set up your page will look like this {and if any of your followers do not update their reader, they'll still be forwarded to your blog!}:
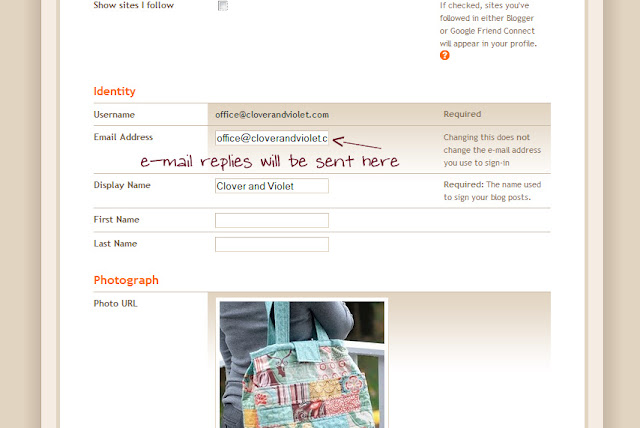
And, you'll also get the opportunity to set up e-mail addresses @ your domain name. Think about it, maybe you're ready to take your blog to it's own spot! If you're interested in making the switch, what's holding you back? If you don't ever plan to switch, what are your reasons? And if you're already at your own
.com, do you prefer to have your own addres?