
Questions? Missed a post? Find the index here.

Download the Embroidery pdf pattern here and the jpg pattern here.
While the finished piece should be on a 10" square, I cut my solid fabric to 12" square and used a 10" hoop for the embroidery work. It was large enough to hold the entire design, but still manageable. The 12" square provided just enough extra fabric for the hoop without too much waste. I fused a 12" square, medium-heavy weight interfacing to the back of my solid fabric. This will help the pocket to be sturdy, and also keep the embroidery stable. Although a light-medium interfacing or fusible fleece would also work, I prefer the way the medium-heavy works for a pocket. Just remember to iron the interfacing on before tracing the design so as not to permanently set the pen.
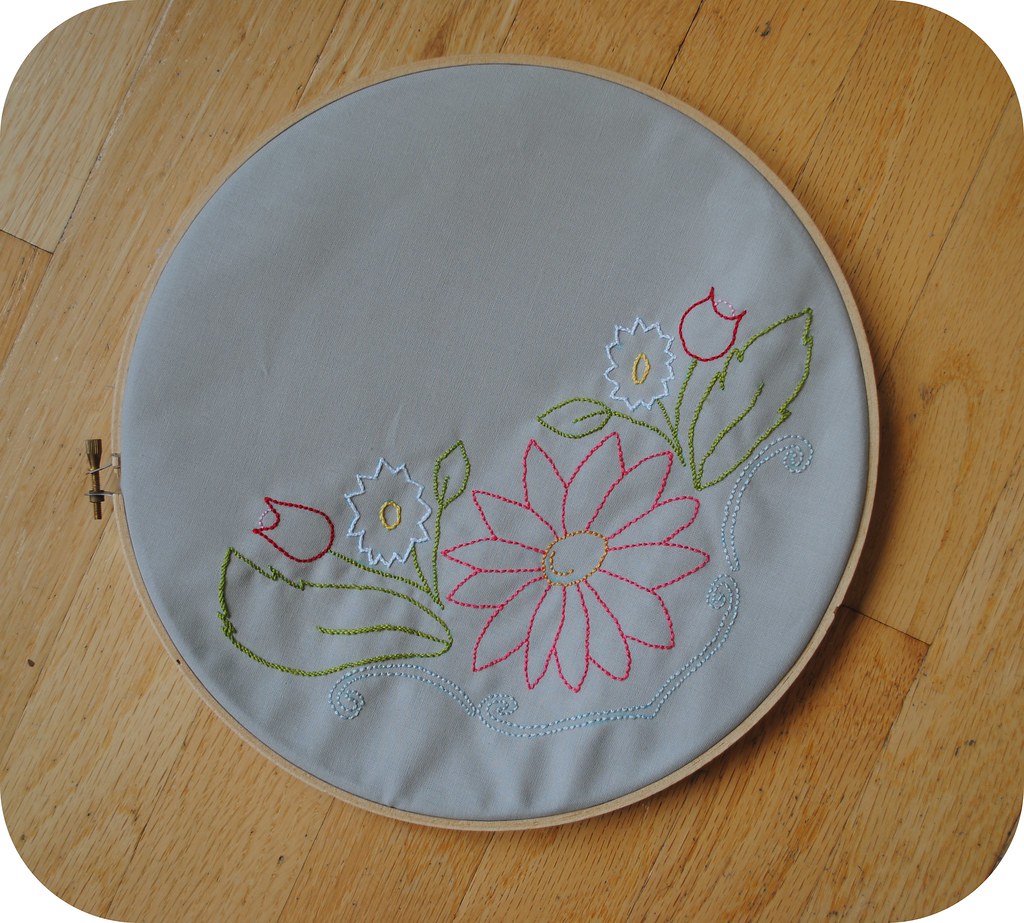
For a simplified version of the embroidery, here is an example of just the outlines stitching. It provides a eye catching piece without too much going on, and is much less time consuming. It uses a few different outlining stitches, but doesn't go much beyond the basics.
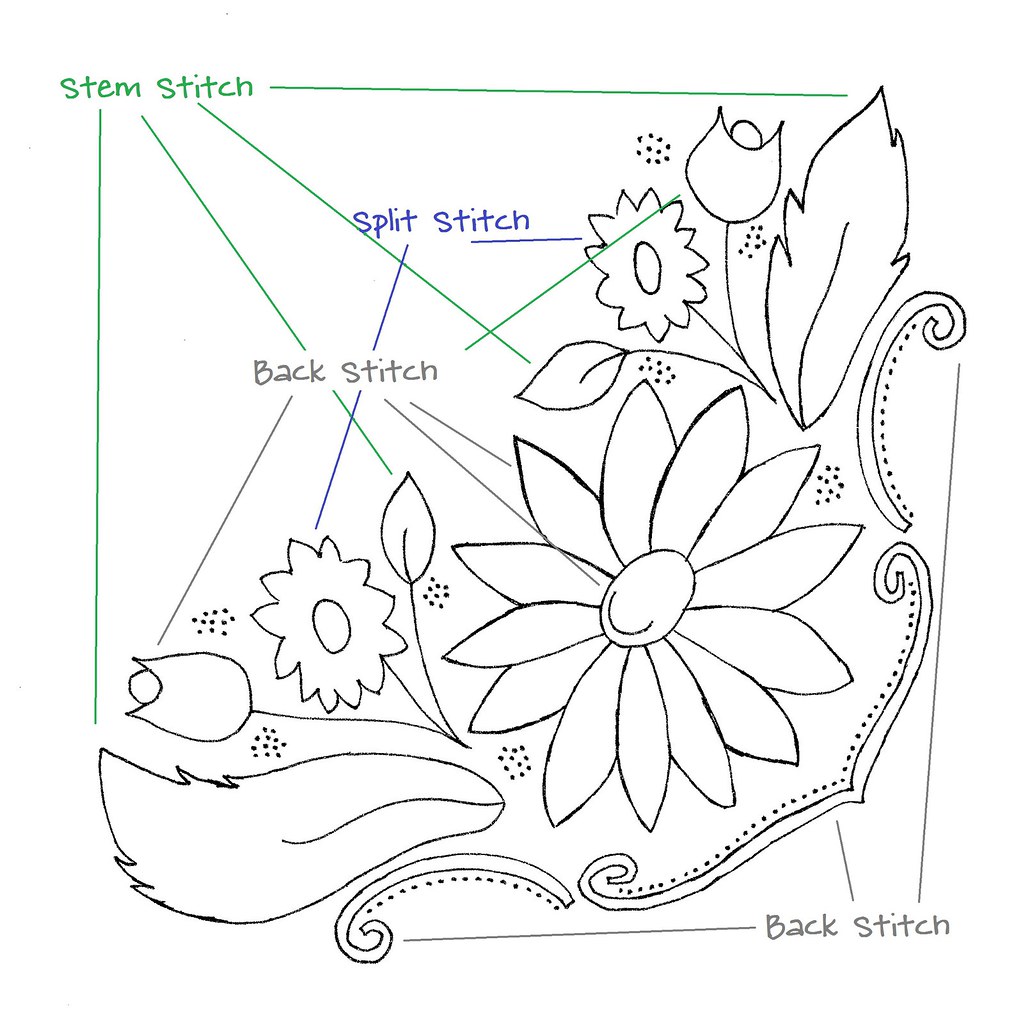
This diagram shows which stitches are used for which portion of the outline in my stitchery, however, substitutions could be easily made to suit individual taste and skill level.
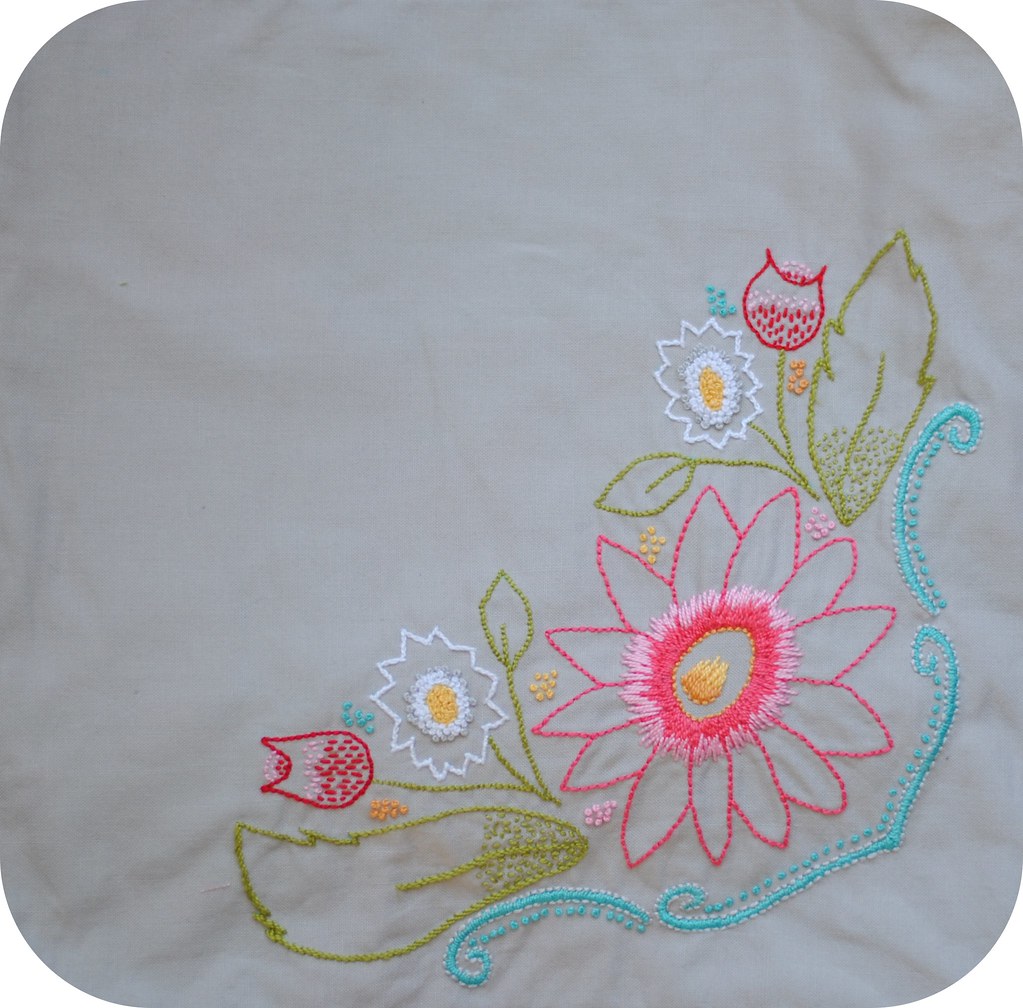
This is the complete embroidery as I finished mine. Since some of the Ruby fabric has almost a watercolor look to it, I decided not to fill my shapes completely, but rather let them taper off a little.
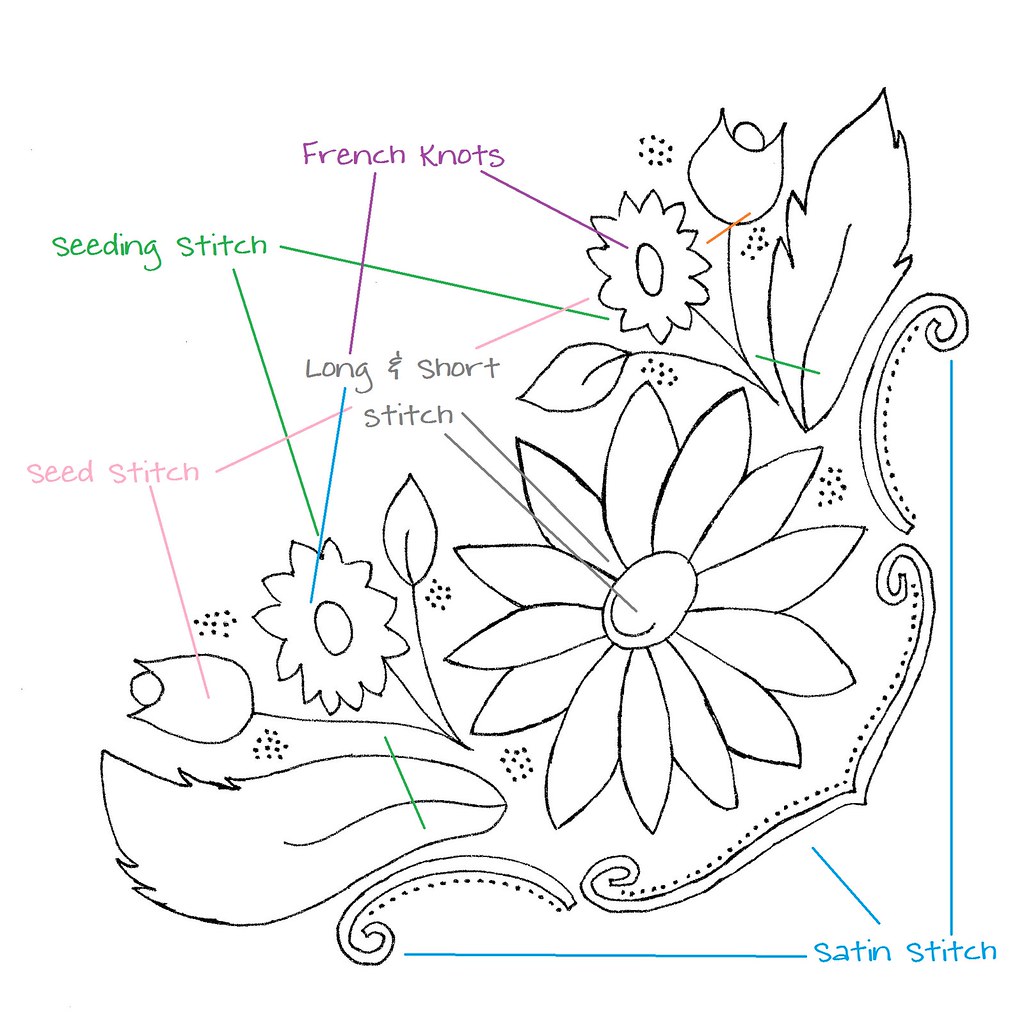
Here are the stitches I used for fill. But, as with the outlines, everyone is welcome to substitute for stitches they like better or are more comfortable with.
Since this is a time consuming piece, we will be working on the bag over the next few weeks, but I am going to allow three weeks for everyone to complete their embroidery before we get to the portion of sewing it onto the bag.
Also, since this is the only embroidery in the Stitch & Quilt Along, we're going to have a little giveaway to go with it. One random person who completes the embroidery design and posts it to the linky will win a little travel embroidery kit! The winner will be drawn after the linky closes. Happy stitching!

Don't forget to show and tell in our Flickr Group! Did you blog about the quilt along, your fabric selection, or threads? Share your post here {please link only to a specific blog post or Flickr photo}:
You do beautiful work. I love the centers of those white flowers.
ReplyDeleteSo beautiful! Thank you so much for sharing your work and giving so much help too. I'm looking forward to getting started on my bag.
ReplyDeleteYou are so very talented!!
ReplyDeleteIt's beautiful Jennie! Thanks again. Now I'd better get started!
ReplyDeleteThis embroidery pattern is SO pretty! I need to find some more time to do all the lovely things I want to do! I am saving this for a rainy day!
ReplyDeleteOH, so pretty! The detail makes the piece. Thanks for sharing.
ReplyDelete