
Questions? Missed a post? Find the index here.

Now that you've gathered up some pretty fabrics, let's cut it up {Please note: you should wait to cut your fabric until you have read the assembly post - to make sure everything is clear. Please do not hesitate to ask questions!}!
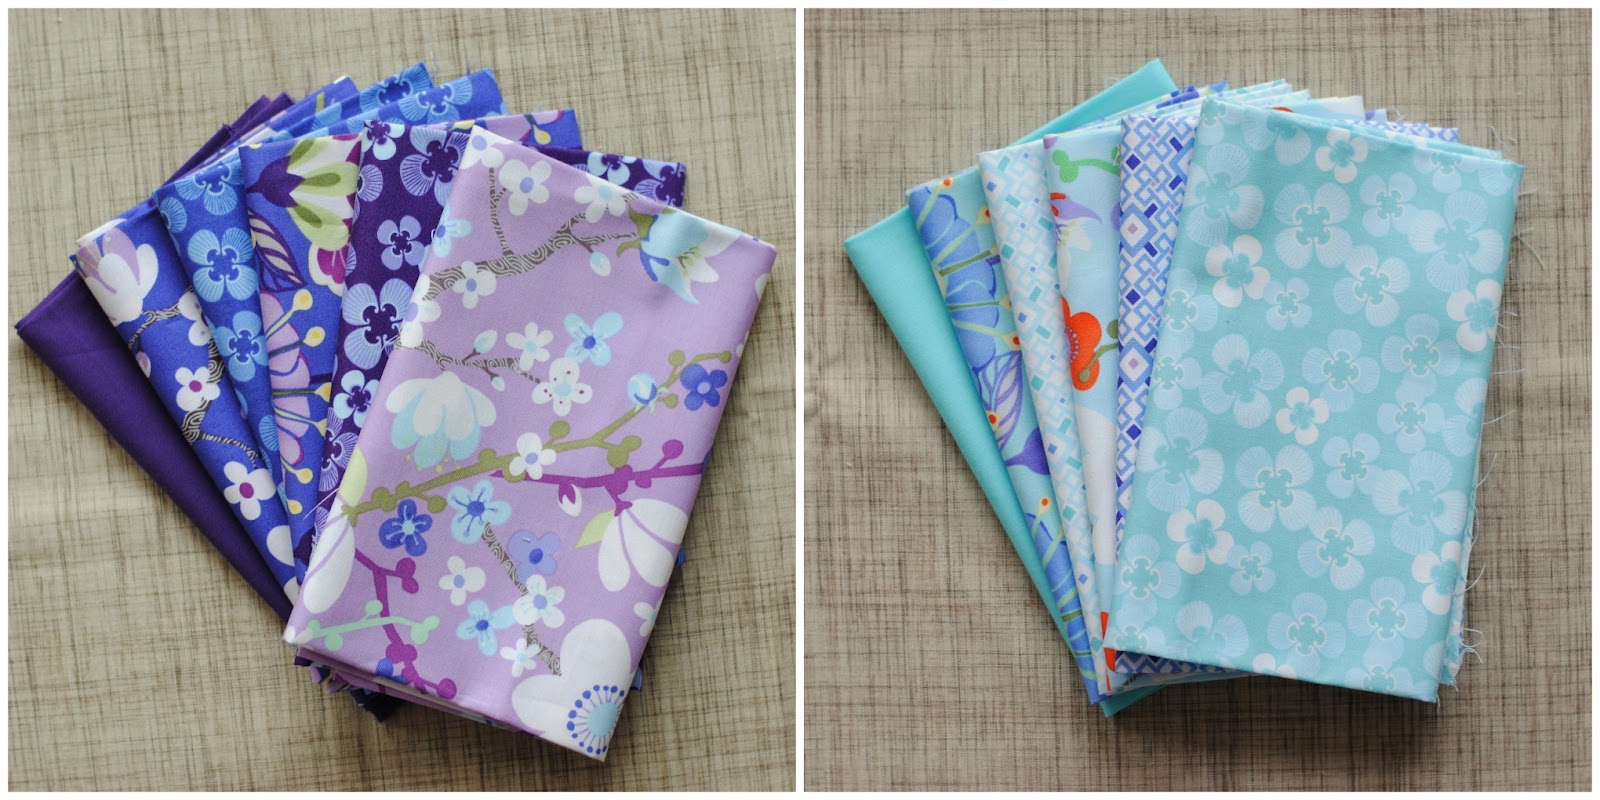
As I discussed in the Gathering Supplies post, you will need twelve fabrics {fat quarters} in two colorways. They can be as distinct or similar as you'd like, but you'll want to divide them in half and keep the halves separate.
Here is how I divided up my Good Fortune fat quarters:
Now, before I start into the cutting, let me start by posting the diagram of the finished blocks. You will have six blocks of each color pattern as follows:


This demonstrates how the colorways work together to form the blocks. Each block requires essentially one fat quarter and one white square. Each fabric will occupy every position in the block and will be in eight of the blocks. Here are the measurements of the pieces {not including 1/4" seam allowances}:
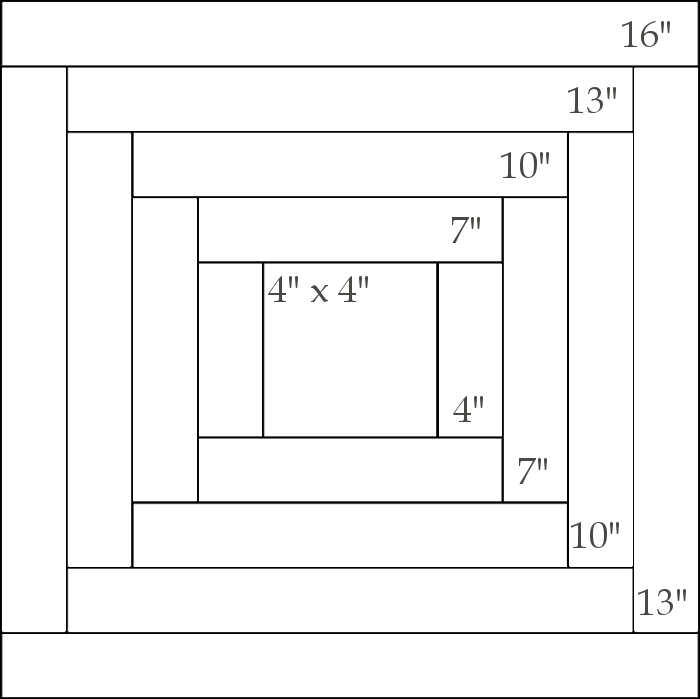
Printed Fat Quarters: cut eight {8} strips {I use a sew and then trim method to make sure every piece fits}: four 2" strips and four 2 1/4" strips. Each strip will make the two sections of the block assigned. Here is a diagram of how the pieces will be cut from each fat quarter:

And here is a photo of how I cut each of my fat quarters:

A note about the 2 1/4" strips: All the pieces for this block will eventually be only 2" {1 1/2" after seam allowances}. However, while making the Embroidery 101 quilt I noticed a lot of fraying on the edges of the blocks while stitching. Therefore, for this quilt I have left the outer pieces 1/4" larger and they will be trimmed before sewing the blocks together. This way a little fraying will not be a problem!
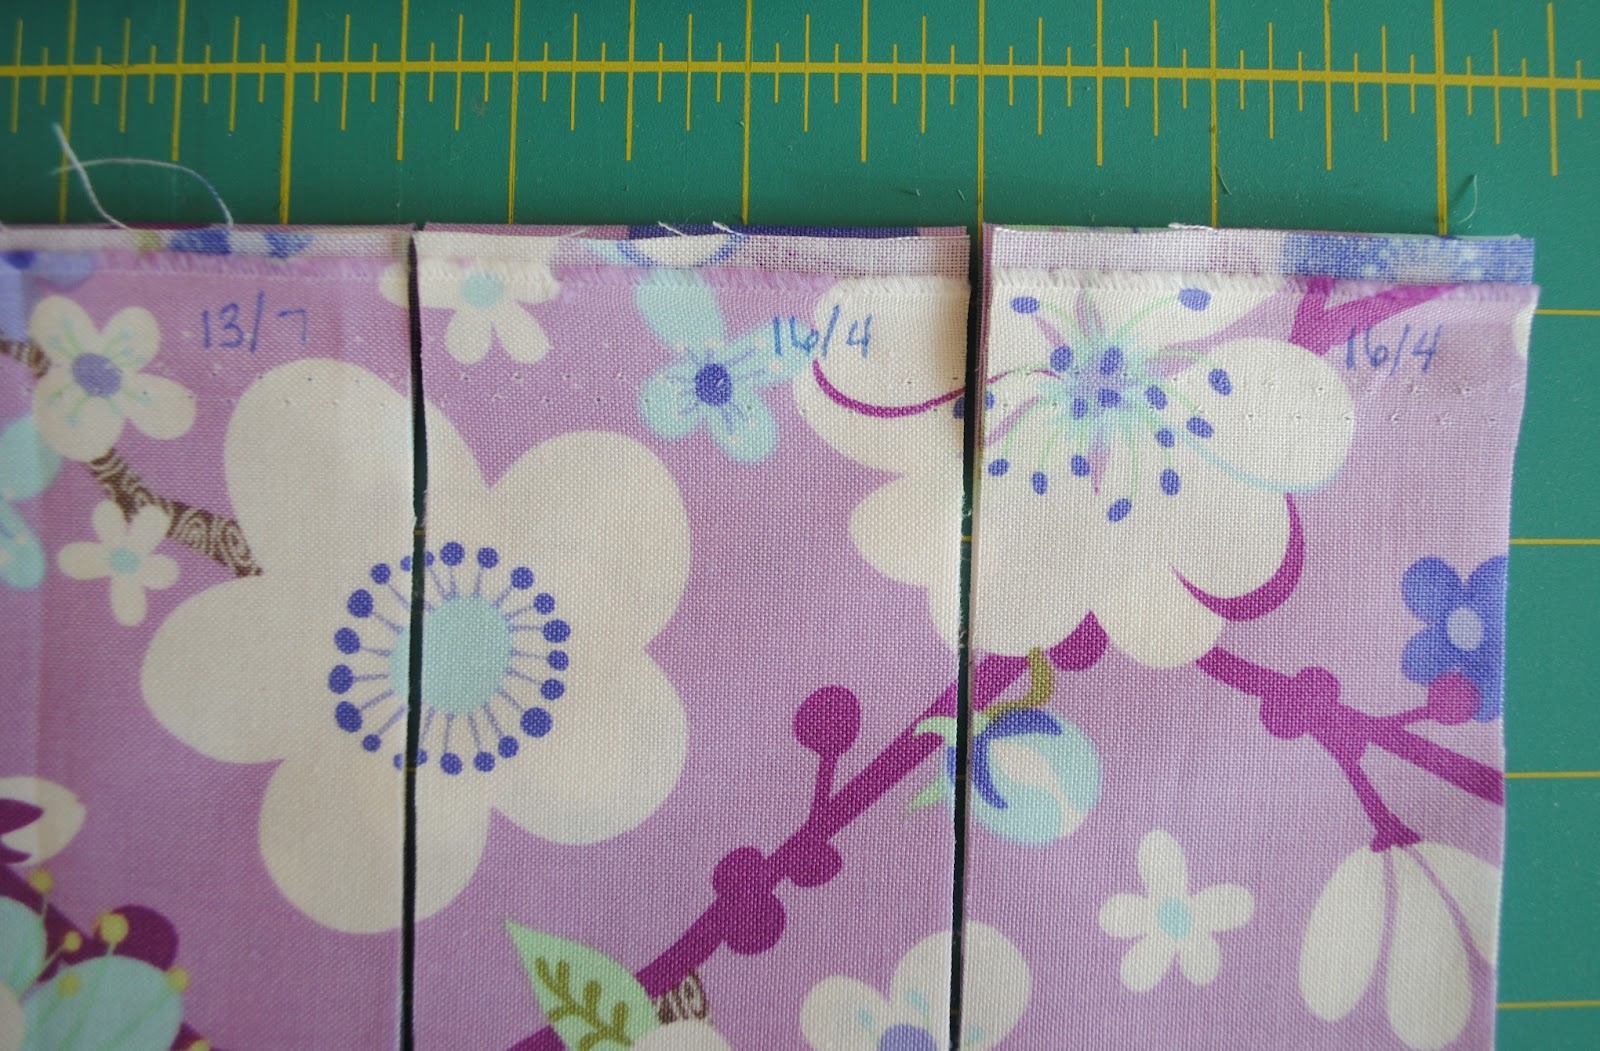
When cutting your strips, I recommend you label the strips so that it is easy to keep track of which strip has been used and which pieces are remaining. To label mine, I wrote the length of both the pieces I would need from each strip on the selvage {in addition, I stored the strips in sandwich bags according to size}:
Solid Color Fat Quarters: I am planning some embroidery designs for these pieces, if you plan to embroider on these pieces as well, iron a piece of fusible interfacing to the back of the fat quarter before cutting. Make sure the interfacing covers the entire fat quarter {I have updated the interfacing requirement to 2 yards in order to allow ample interfacing for these two fat quarters. Sorry for any inconvenience!}. Then, cut the fat quarters in the same method as the printed.
Embroidery Square Fat Quarter: For the embroidery you will need twelve 4 1/2" squares. Before cutting the squares, iron 1/2 yard {20" wide} piece of interfacing to the fat quarter. Then cut the squares as shown with the interfacing on the back:

As I mentioned before, wait to cut into the fabric until you have read the assembly directions.
I found it easiest to cut the fabric and assemble the blocks with a cutting diagram at hand, so I've made a printable. Click here to download and print!
If you have any questions, please ask and I will be happy to address them!

Due to unforeseen dilema's...I'm going to be missing this QAL! I'll be watching. Have fun.
ReplyDeleteOh boy, oh boy, oh boy....
ReplyDeleteThis comment has been removed by a blog administrator.
ReplyDeleteGreat post--nice and clear. I'm anxiously awaiting my fabric. We're having a little snowstorm, but I'm sure it will make it through soon!
ReplyDeleteJennie, I feel silly I am suppose to cut now or wait?
ReplyDeleteGo ahead and cut, but make sure you read the assembly directions before getting started!
DeleteSo in our twelve fat quarters we should have selected two that were solids, is that right? Therefore we will have 10 printed fat quarters, 2 solids and the additional fat quarter for the center?
ReplyDeleteJust want to make sure as my two color ways are all patterned. Thanks
The kits both have two fabrics that are solids, in addition to the embroidery solid. There will be some simple designs on those blocks. However, this is completely optional and you are welcome to choose all printed fabrics. You can then decide whether you want to do the added embroideries on a few prints or not!
DeleteI'm about to start cutting the fabric and have a question (or two or three). It's my first time doing a fat quarter quilt.
ReplyDeleteI can see that I initially fold and cut each fat quarter into strips, four that will be 2 inches wide and four will be 2-1/4 inches wide. So, then I cut these strips into the smaller sizes of 16-1/2 etc., right?
Once I cut these and the white squares, do I piece all the blocks at once?
And is there some placement order I should be aware of or will that all work itself out in the long run? (Yup, I did manage to end up with three questions.)
Thanks.
Okay, I just found the pieces answers in the piecing post. Sorry about that!
ReplyDelete