

As promised, here is my Kindle Cover tutorial {sorry for the delay...we had some friends come visit, and I didn't coordinate my time before their arrival very well - but we had a blast!}.
Supplies:
1 Charm pack or assorted scraps {for outside}
5/8 yard print
Velcro
Elastic {choose a color to match the reader, not the cover - I used black}
Buckle {optional}
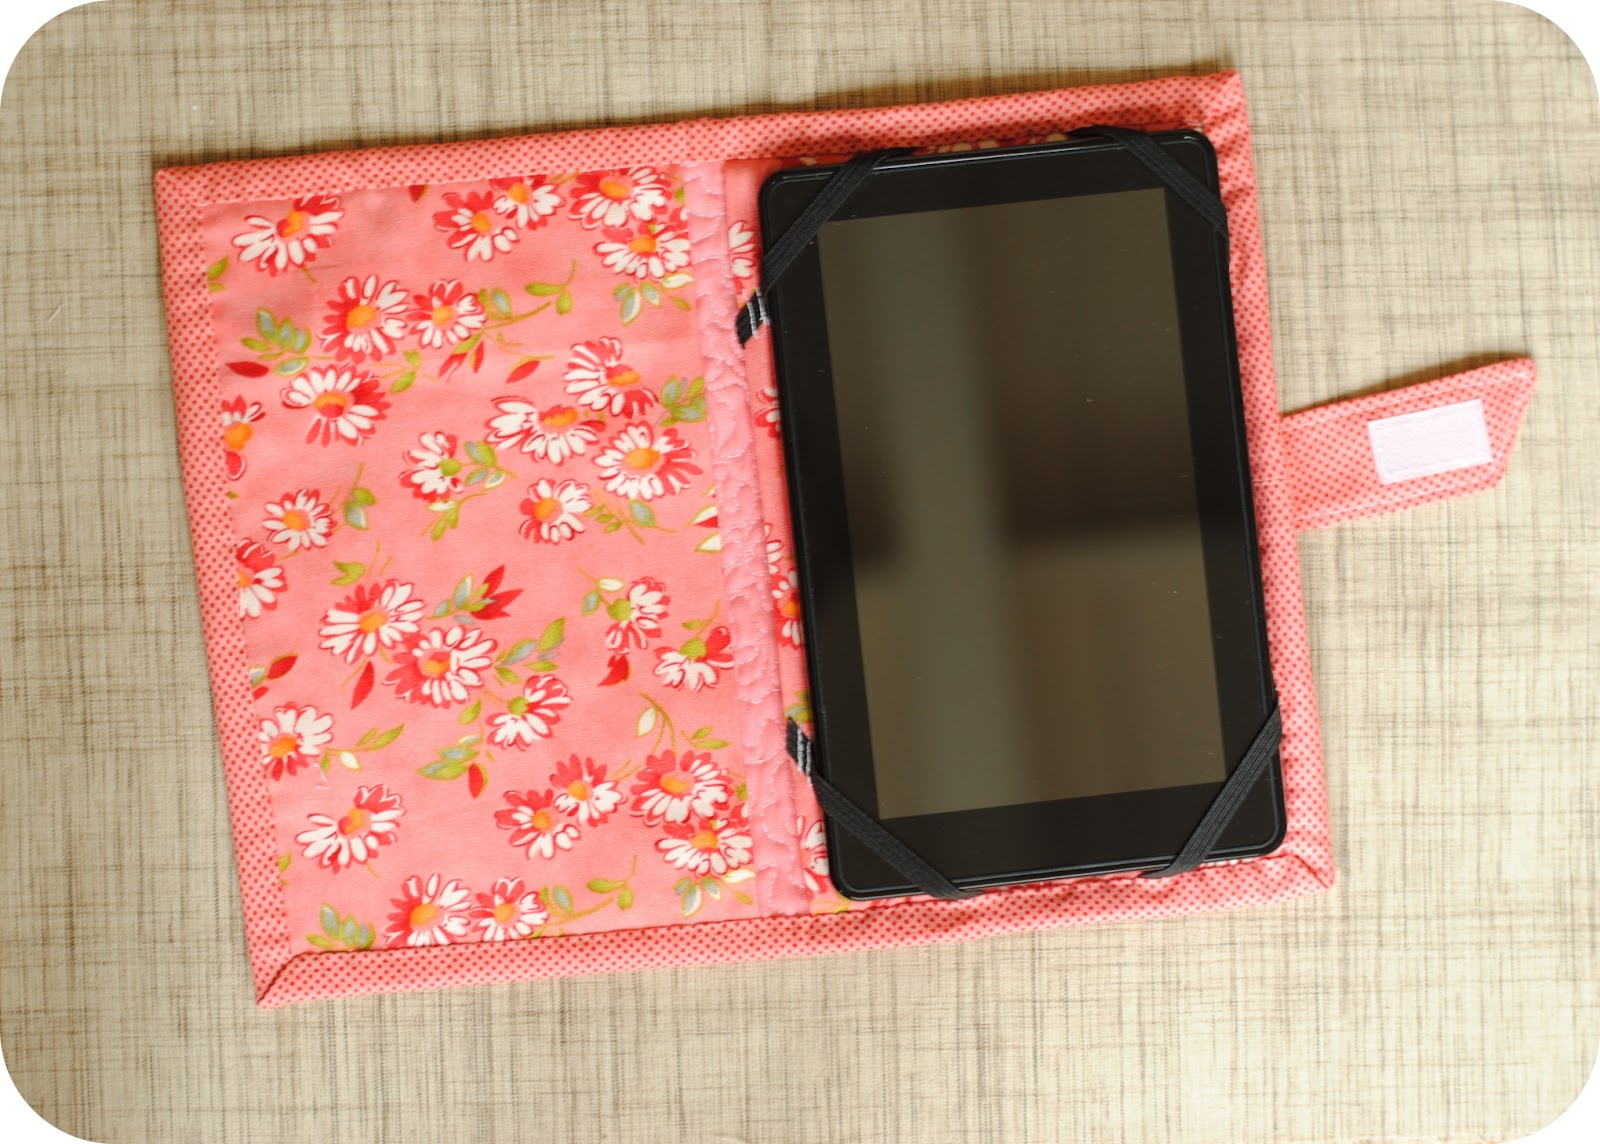
First, measure your reader, my Kindle Fire measures 7 1/2" x 4 1/2". To determine the measurement, double the width and then add 2 1/4" {note, the Kindle Fire that I have measure about 1/2" thick. If your reader is flat or nearly flat, remove 1/2" from the width. For the height, add 3/4". So, the finished measurement for the Kindle Fire cover is 11 1/4" x 8 1/4".
Arrange your fabric as desired for the outside. For the cover on the top I used half hexagons, you can print the template here. For the cover on the bottom I used blocks from The Farmer's Wife Sampler Quilt book.

After piecing the outside {I am hoping to make a few more of these, so I'll update with other ideas!}, layer with batting and quilt to a piece of fabric. Next, cut to pieces of fabric 1/4" narrower than the cover, fold these in half to make the pockets for the inside of the cover. There should be a gap between the pieces, as shown:

Along the folded side of the left pocket, stitch the elastic in place separate from the outside of the cover. Stitch 1/8" and 1/4" from the edge {by stitching in two places, the pocket does not curl up when the Kindle is placed in the cover}, as shown:

Stitch the loop side of the Velcro closure to the front of the cover. Then, place both pockets on the wrong side of the cover and stitch 1/8" from edge of cover outside to keep pockets in place. Then, attach the other sides of the two elastics, plus the remaining two elastics in the corners, as shown:

Next, make the closure as you desire. Here are the two methods I used, the buckle{honestly, I didn't write down the dimensions because it will vary for any buckle!}:

and the flap {my flap is 2 1/4" wide before seam allowances}:

Sew your closure to the outside of the cover before sewing the binding, like this:

Then, cut one 1 1/2" x WOF strip for the binding. I'm going to use a single fold binding method. The construction is similar to the traditional double fold {see my binding tutorial}. Sew the binding to the outside of the cover:

Then finish the binding like this:

I had originally machine finished my binding on the Farmer's Wife Kindle Cover, but since I decided to change the white elastics out for black, I was happier with the hand stitching on the Hexagon Kindle Cover, so I hand stitched the binding back down, here's the before:

And the after:
I think it is much improved! Then, I just cut a piece of plastic canvas and slip it in one {or both} of the pockets to give it a nice sturdy shape!
If you have any questions, feel free to ask. I am making a cover for a friend, and she has a Kindle Keyboard,
And, if you make a cover using this tutorial, I'd love to see it! Please post it to our Flickr group!

Jennie, is there anything you can't do? You have such a talent and I so enjoy seeing your creations. Beautiful quilted covers and wonderful tutorials.
ReplyDeleteSo pretty and functional! Your tutorial is great. I always get myself all confused when thinking about the inside-out stuff. Half the time I get it wrong and have to redo it!
ReplyDeleteWonderful tutorial....thanks!!
ReplyDeleteVery cute Jenni! Thanks for the tutorial.
ReplyDeletethanks for this great tutorial...^^
ReplyDeleteWow! I really like your Domestic Bliss one!!
ReplyDeleteBrilliant tutorials! And I love the covers, they are so pretty and colourful!
ReplyDeleteHelen x
great tutorial!
ReplyDeleteWill you be selling these on Etsy? Love your tutorial, and I do sew, but an Etsy purchase would be so nice.
ReplyDeleteHi there, I don't think I'll be making any for the Etsy shop, if you're interested in a custom order, e-mail me and I may be able to help you out!
DeleteI don't have the Farmer's Wife Sampler book (yet?). I love the kindler cover in the melon color. Can you tell me the name of the block>
ReplyDeleteIf you look back to my Farmer's Wife in Your Life post here, you will find the names of all five blocks I used for the melon color Kindle cover.
DeleteOk, I'm going to try and make one today!! I'M not good at following directions. I'm a little confused when you talk about sewing the elastic strips on because in one picture you have the pocket folded and then I think it's turned another way in the other picture. I get so confused but I'll just jump in and figure it out as I go. I'm a beginner at projects like this which is a long way from sewing a straight line.
ReplyDeleteGmama Jane
Very cute! Will make one but will scale it to fit my tab (when hubs gets it for me! ;)). Was wondering if interfacing (strong ones) will make it sturdy?
ReplyDeleteI think a nice strong interfacing would make it sturdy. I just like to use the canvas because it can be easily removed and I know how it washes up. With little kids, all my fabric stuff ends up being washed!
DeleteThis is a great project. I am to the point of sewing on the elastic. I am making this for someone else and do not have the Kindle Fire here. I am uncertain about how far down the side to place the elastic so that it fits over the corner and not in the screen area. I think it is about 1 1/4 inches. Does that seem about right?
ReplyDeleteThe elastics are actually about 2" down the sides {if you include the part that is under the binding} and 1 3/4" from the bottom corners {also counting the portion under the binding}. I hope this helps. I could not e-mail a reply to your comment because there is no e-mail address in your profile.
DeleteGreat Idea , congratulations.
ReplyDeletehttp://tearpiaocupacional.blogspot.com.br/
Love this tutorial! I made one for a Kindle Touch and I added a pocket to the left and a slot for the light that M-Edge makes to the right. It was for my brother's girlfriend's graduation, but I may make one for myself now.
ReplyDeletedo you know, will this fit a Nook?
ReplyDeletethanks julie