
Questions? Missed a post? Find the index here.

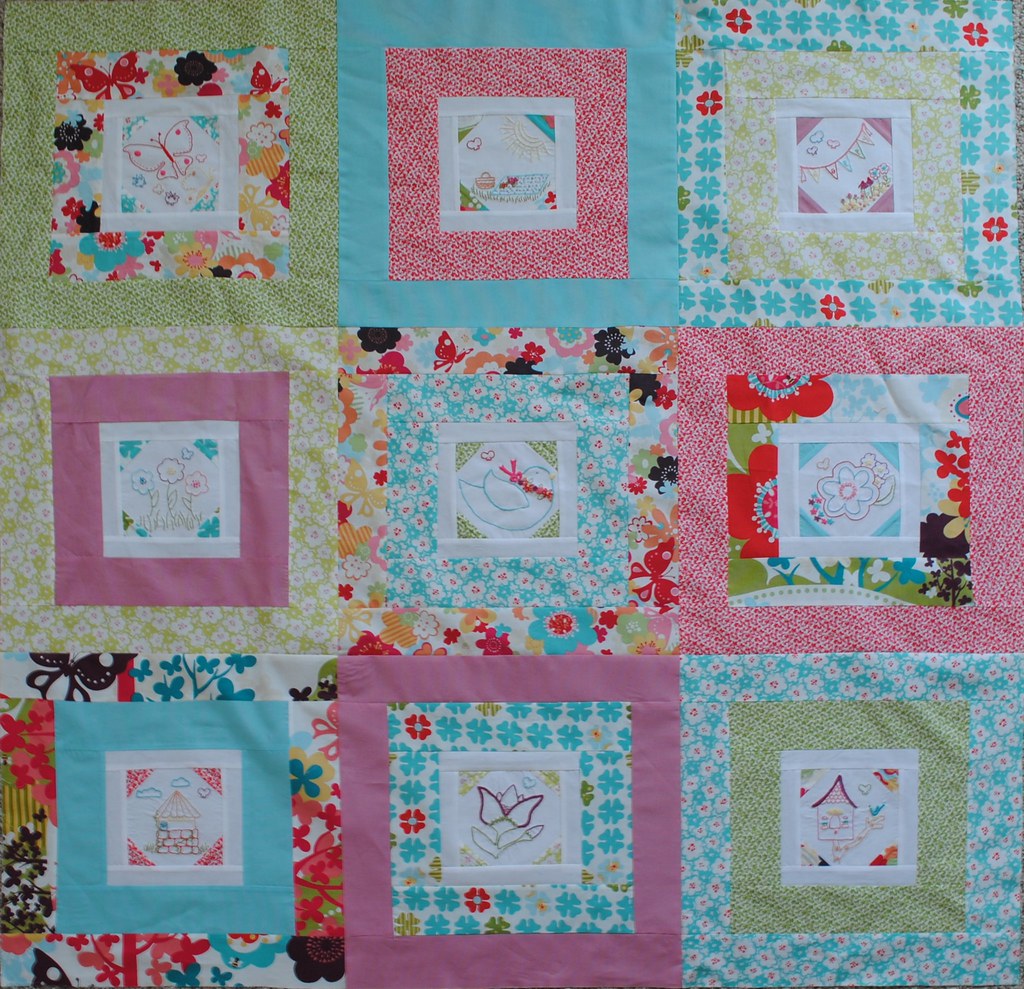
If you're having a difficult time deciding which block should go where, chose a somewhat pleasing layout, take a photo of it, and then give it a rest. Come back to the photo a little later and see if it really is the layout you prefer, or if anything needs to be moved. Here is my final layout:
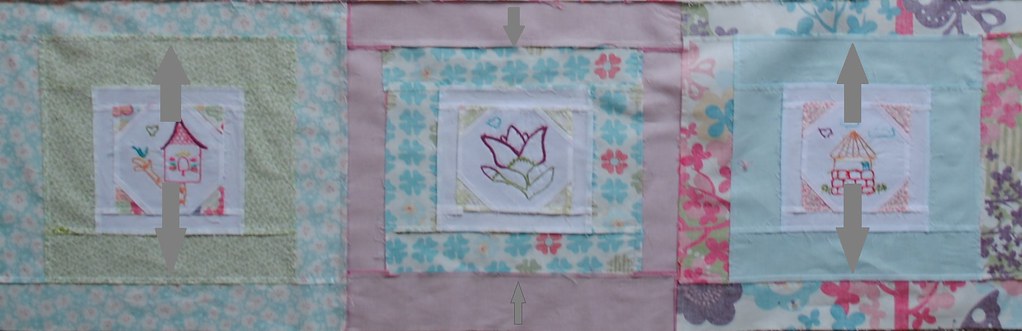
When assembling the quilt blocks, press the seams in opposite directions to line up the corners. For one row, press seams as follows:
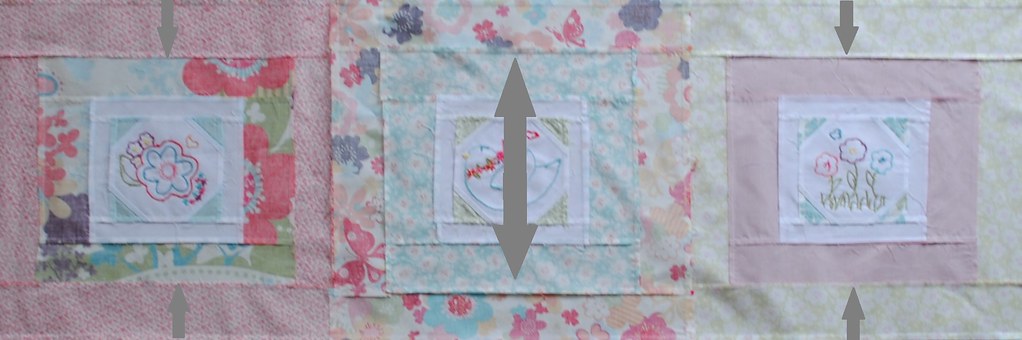
The next row would be pressed in the opposite direction, like this:
After stitching the rows together, press the seams in the same manner, like this:
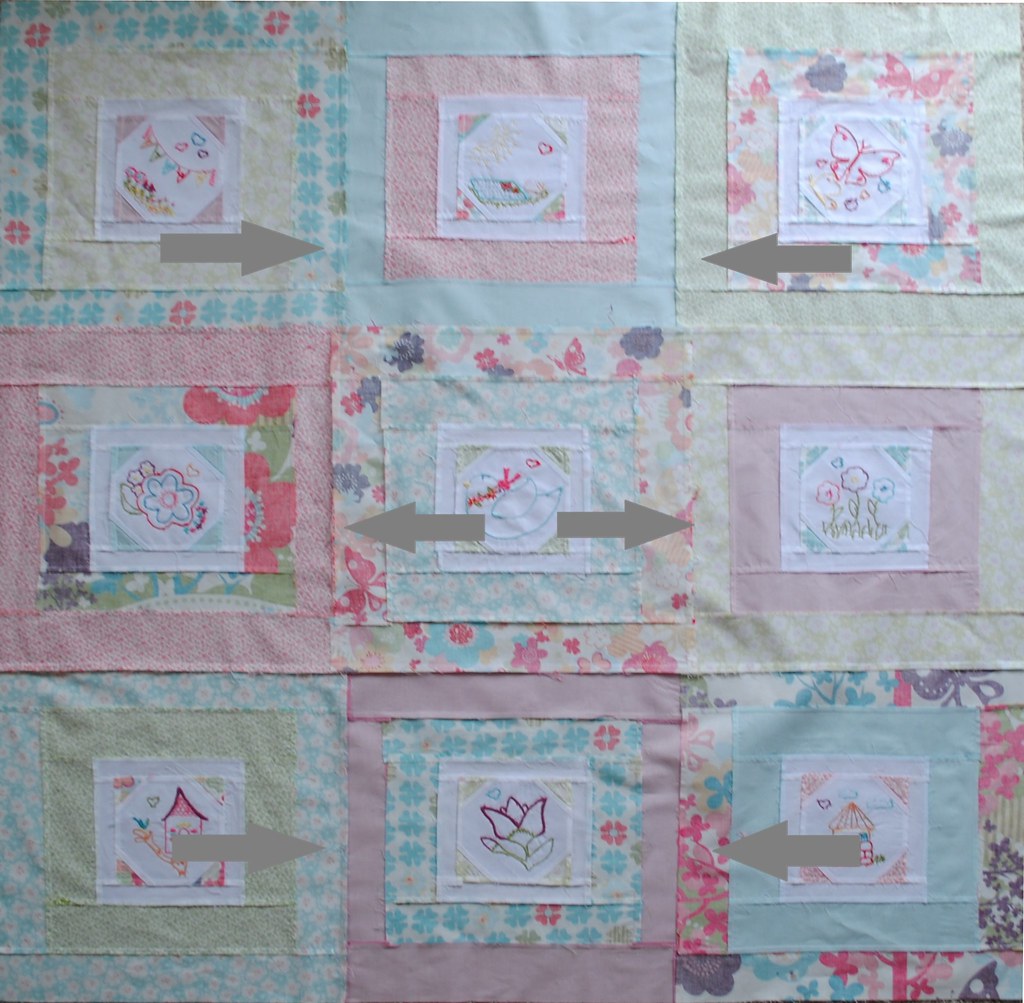
This should help all the corners to line up easily because the fabric will be fewer layers and the seams will nest together.
Now that you've seen how I've assembled my quilt, I'd like to show another option, adding a sashing. {Please note: I did not plan for a sashing in the original quilt design, therefore, additional sashing fabric will be needed, as well as some additional backing and binding to the requirements listed here.} Janelle of Echinops and Aster is also a Stitch & Quilt Along participant, and she's done a mock-up of a sashing in photoshop {and she doesn't mind me sharing it with everyone! You can read her post here.}. Here's her first sample:


Hopefully this helps you get all those lovely embroidered blocks together. And now, as promised, there is a giveaway for everyone who has a completed quilt top. To enter, link a blog post or Flickr photo of the finished quilt top to the linky below. The winner will be drawn at random for all qualifying entries on October 26th. We've partnered with Sew Lux Fabric to give the winner free fabric: 6 half yards {or 12 fat quarters} from the Sew Lux Fabric & Gifts Shop! {In order to win, we must be able to contact you; please make sure your e-mail address is in your linky entry!}


I just finished block 8! boohoo....what happened to the time. I better get buzzing on block 9.
ReplyDeleteI'm excited to see it all together...I just have a BUSY month...and other things are taking over my time.
Thanks for keeping this going for us Jennie&Clara!
Already? Oh boy...better get crackin'!
ReplyDeleteIt looks so pretty! Some day, some day, I will make a quilt and do it the right way...without cheating, like I normally do, ha ha! It's so adorable!
ReplyDeleteWill you be leaving the embropidery stitch tutes, instructions and pdfs up for use after the end of the 101? Thanks,Marcia
ReplyDeleteSo beautiful...i need to finish stitching the block 9. Oops... is the giveaway open to International entries? Thanks!!
ReplyDeleteWow - thirteen finishes! It was so fun = thank you Jennie! I'm sandwiching mine right now.
ReplyDelete