

This is my first tutorial and I must say it was fun to make. I think I
will be doing more of these! I hope you enjoy this little project and
will make some hexagons and sew them on to different projects. Just pack
a little bag of prepared hexagons with a needle, thread and your pre-
traced embroidery hexagon and it will be fun to work on where ever you
are on the go to.

Supplies
needed: Freezer paper, pen or pencil, hexagon shape, fabric, fusible
interfacing, transfer pen, transfer pattern, needle, embroidery floss,
and thread
I used this freezer paper, but any kind will work. I also used a hexagon template and a Fine Point Mark B-Gone Pen.

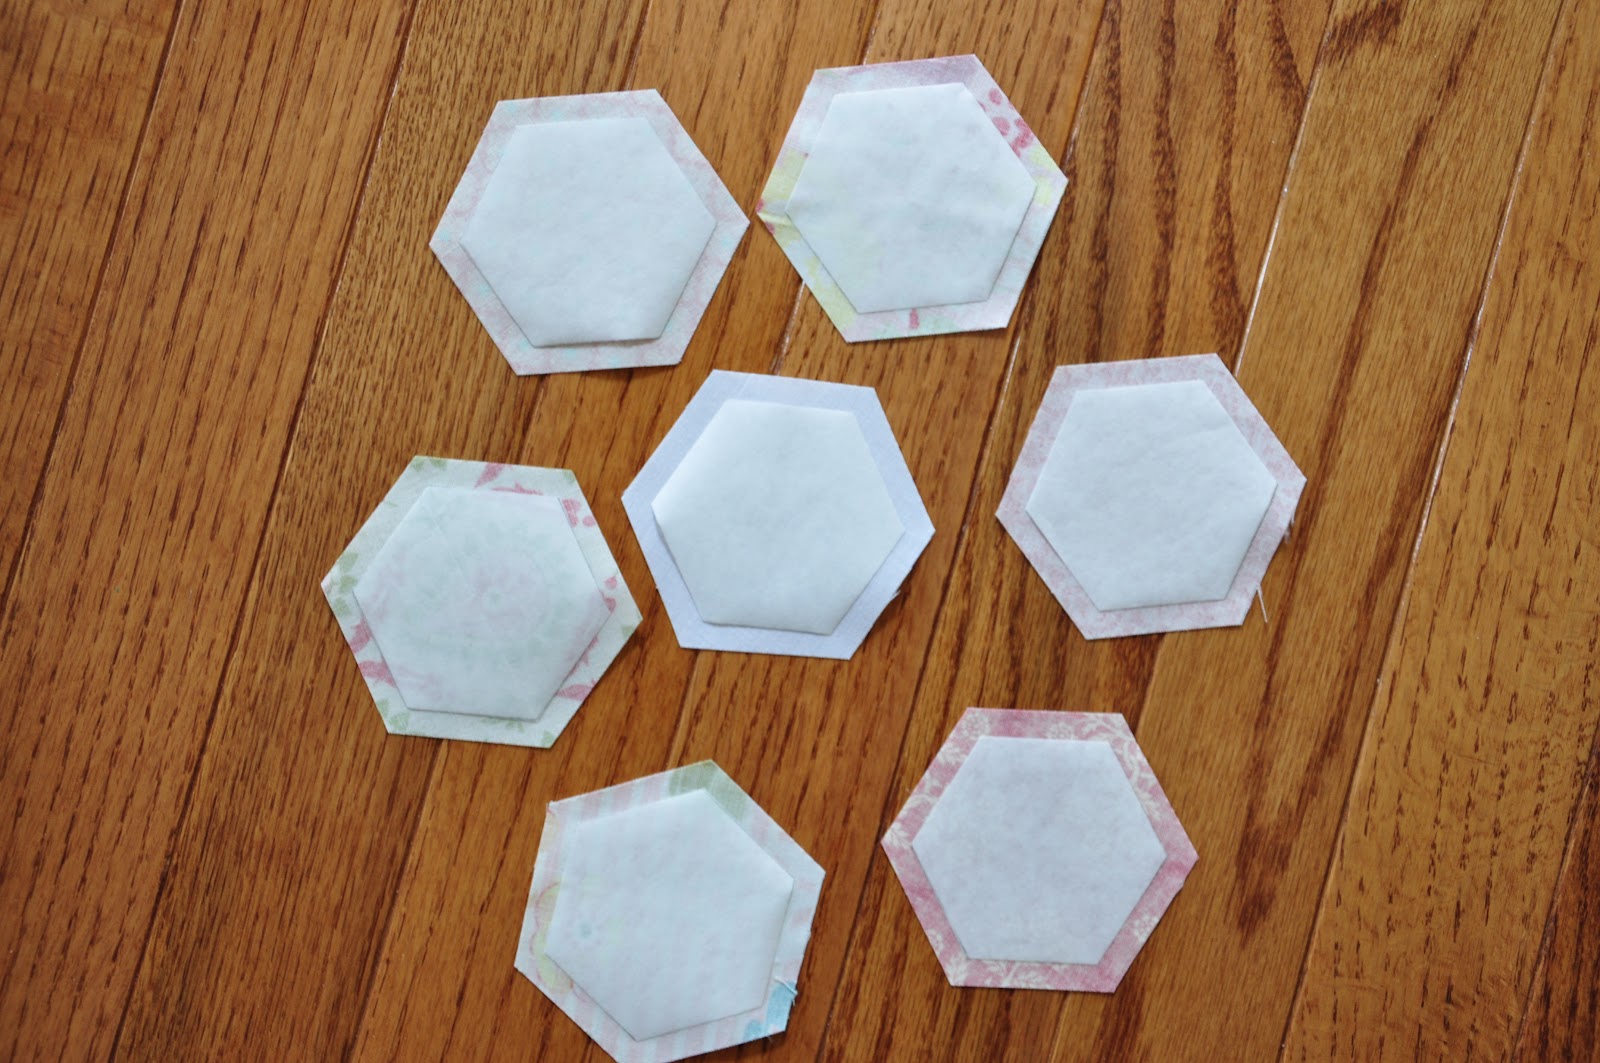
Trace the hexagon onto the freezer paper with a pencil or pen. Cut out 7 shapes, then iron them onto the back of the your fabric choice. I used 6 printed fabrics and one white piece for the center for the embroidery.

Cut the hexagon shape from the fabric adding 1/4" seam allowance. I used my ruler and rotary cutter to make it easier.

You will have 7 fabric hexagons with freezer paper cut and ready to continue.
For the center white hexagon I used fusible interfacing to make it more stable for embroidering. I removed the freezer paper before fusing it to the white fabric.

After the interfacing is fused on to the white middle hexagon, trace the design on with the transfer pen or a pencil will also work. Be sure "not" to iron while this pen is on your fabric or it will set it. If you use the transfer pen and make a mistake just simply give it a little spritz with water or even Best Press works.

Embroider your design! I have included a little drawing that I made for you to use if you like (download it here), or use any other drawing that you want. Or, you could just use another printed fabric in the center if you would rather not embroidery.
Any embroidery floss will work, I used Pearl Cotton #8.

After the center is embroidered, stitch with a running stitch, in a different color, turning all the seam allowances to the back , finger pressing only. I used grey thread so it would be easier to see the basting stitches when removing. There are many tutorials on making hexagons. I used this tutorial.

Then stitch the seams together in the order you like with a small little whip stitch with right sides together.

After all your hexagons are sewn together, remove the running stitches from the front and back. I then blotted my embroidered hexagon with a little water to remove the blue pen markings. Then, remove the freezer paper and you can press it flat and sew it onto any project you choose.
I think they would be cute added to a pocket on the front of a bag, an apron pocket or even the bib of an apron, or on a dish towel to dress it up. Another idea is make a little mug rug, a small wall hanging, even on the bodice of a little girls dress. I would love to make a whole quilt out of hexagons!

WOW, that's gorgeous! I need to do some embroidery again! Love it.
ReplyDeleteI pinned this to my hexagon board!
ReplyDeleteLovely as can be.
ReplyDeleteVery pretty, I think you are right it would look great on a bag.
ReplyDeleteOh wow! I never would have thought of this! Thank you!
ReplyDeleteThank you for the tutorial! Gorgeous! This project is at the top of my to do list.
ReplyDeleteSo pretty! It's a great tutorial and I love the embroidered hexie in the middle. Thanks so much for taking the time and for sharing the stitchery design too.
ReplyDeleteMargaret
Beautiful embroidery!!
ReplyDeleteLOVE the mix of embroidery and quilting!!! xoxo Kim
ReplyDeleteI do tons of hexis but I've never put embroidery in the centre. Thanks for the idea!
ReplyDeleteOoh this is so cute...and beautiful. Thank you for sharing:)
ReplyDeleteThat is SO cute! Thanks for the tute, Clara!
ReplyDeletehey thats just what I've been doing!!
ReplyDelete